








If
you
have
the
right
type
of
machinery
and
a
big
farm
to
work
them
on
silage
making
is
a
real
joy.
It
is
much
easier
than
making
hay
and
rapidly
replaces
most
other
methods
of
forage
conservation.
The
quality
of
the
final
product
can
be
ensured
& maintained much more reliably, because you are so much less dependant on prevailing weather conditions!
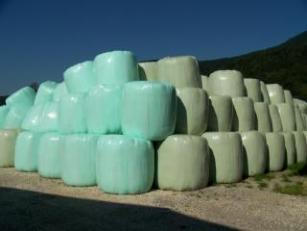
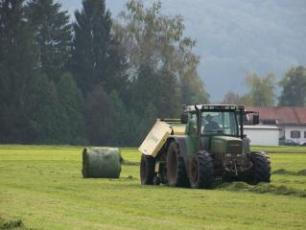
The
latest
approach
of
making
large
round
bales
of
haylage
wrapped
in
plastic
sheeting
(all
of
which
is
done
by
special
machinery)
is
gaining
in
popularity
very
rapidly
and
some
of
the
nicest
silage/haylage
I
have
ever
encountered
is
made
by
this
method.
Environmental
compatibility
(think
about
the
huge
quantities
of
plastic
packing
material...)
should
surely
be
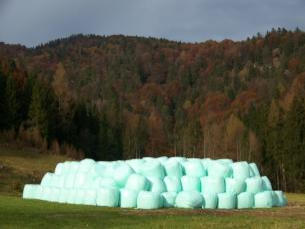
considered much more than is presently done and nothing spoils beautiful scenery more than a mountain of silage bales...
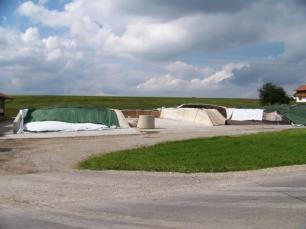
Silage
made
in
concrete
bunkers
has
the
distinct
disadvantages
of
not
being
ration-able
(once
opened
it
should
all
continually
be
used
up),
portable
(in
case
you
have
too
much
and
wish
to
sell
it...)
and
needing
a
permanent
structure.
For
some
sort
of
forages
as
chopped
maize
and
brewers
waste
which
can’t
be
packed
in
round
bales
it
is
the
obvious
choice.
As
it
must
be
filled up as fast as possible and also needs powerful compaction you will still require heavy machinery to make it.
The perfect solution for manually making the world’s best silage
Not
having
any
machinery
of
our
own,
silage
making
used
to
be
a
major
nightmare
for
us,
year
after
year...
We
never
knew
whether
a
tractor
would
be
available
for
hire
and
at
which
cost
and
many
times
we
didn’t
have
a
large
enough
piece
of
pasture
available.
When
we
finally
managed
to
solve
above
the
real
nightmare
was
just
only
starting:
Half
the
time
was
anxiously
spent
waiting
for
the
tractor
and
machinery
to
be
repaired
(while
we
were
in
the
middle
of
a
silage
heap!),
the
other
half
it
usually
rained
so
heavily
that
we
had
to
wait
for
drier
conditions.
How
we
ever
managed
to
finish
a
single
heap
without me having died of a nervous breakdown in the meantime, is now a mystery to me! Well, I was still much younger than...
Tower
Silos
and
wells
have
caused
many
fatalities
through
suffocation!
Before
you
even
consider
building
or
using
this
type
of silo design please heed following warnings carefully and never forget about the risk involved!
•
Never
work
in
or
around
a
tower
silo
alone!
Somebody
must
always
be
present
on
the
outside
to
observe
and
initiate
rescue in case of an accident
•
If you feel even the slightest bit if dizzy while inside a silo get out at once!
•
Before
ever
entering
a
tower
silo
make
sure
the
conditions
at
the
bottom
are
safe.
Working
in
windy
weather
is
helpful,
ventilating
the
inside
before
entering
is
an
absolute
must
(like
adding
a
lot
of
forage
beforehand)
and
testing
would
be
optimal.
An
ancient
method
of
testing
(air
conditions
in
mining...)
is
still
really
useful
for
tower
silos
today:
Lower
a
bird
in
a
cage
or
cockerel
on
a
long
tether
to
the
bottom
of
the
pit
and
observe
it’s
behaviour.
If
it
remains
calm
and
active
(and
not
just
for
a
minute...)
it
is
probably
safe
to
enter.
Otherwise
pull
it
out
immediately
to
prevent
the
bird
from
coming to any harm and
DO NOT
enter yourself!!!
•
Tower
silo
design
for
mechanically
assisted
fill-up
and
withdrawal
of
forages
calls
for
very
tall
and
narrow
structures.
This
design
is
absolutely
unsuitable
for
filling
and
withdrawing
forages
manually!
Here
the
diameter
should
be
very
close to the total depth, and the structure is not really a tower at all!
WARNING

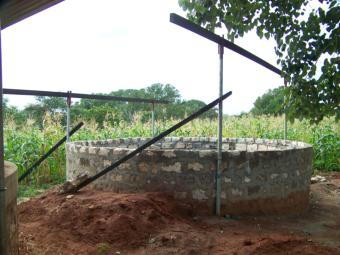
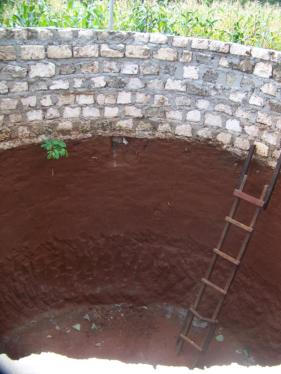
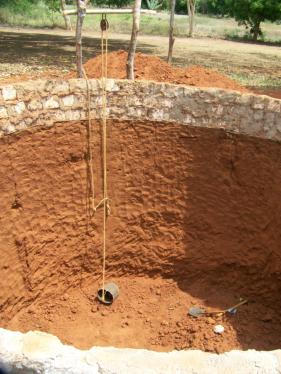
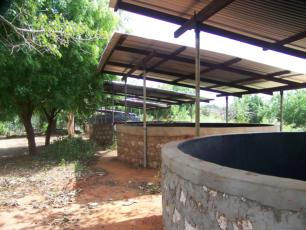
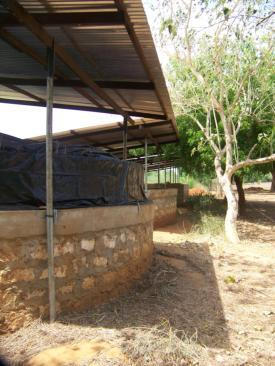
The pictured design has worked wonders for us & is fully described below:
1
.
Location:
The
soil
should
be
neither
too
sandy
nor
rocky
and
the
ground
water
should
never
(even
in
the
worst
rain
season
imaginable)
approach
the
bottom
of
the
pit.
Slopy
land
or
hilltop
is
fine
but
never
dig the pit in a natural depression
2
.
If you can’t ensure all these conditions rather build up than down
3
.
Dimensions
depend
upon
the
number
of
cow-days
to
be
fed,
our
pits
of
5
meters
in
diameter
and
6
meters
deep
store
close
to
120m³
or
80
tonnes
of
silage
each
which
will
feed
one
hundred
cattle
(mixed
herd) for approximately one month.
4
.
One
of
the
most
crucial
and
important
aspects
of
designing
a
good
silo
is
to
ensure
that
withdrawal
amount
of
ready
made
silage
is
a
minimum
of
4”,
still
better
6”
of
the
opened
silo-face
every
day.
Removing
less
will
expose
the
ready
silage
to
fresh
air
for
too
long
which will drastically reduce it’s feeding value for your cows!
5
.
It is wiser to build many small pits than one or few large ones
6
.
Only
the
above
earth-level
part
is
built
with
blocks,
the
underground
part is only dug, lined with weld/wire-mash and then plastered
7
.
Before
initially
using
it
and
before
every
refill
walls
should
be
thoroughly cleaned & painted with a bituminous water based paint
8
.
The bottom is plain earth, as free draining as possible
9
.
A
roof
to
keep
all
rain
water
out
is
an
absolute
must
if
storage
longer
than to only the next dry season is attempted
1
0
.
The
polythene
sheeting
will
only
line
the
top
meter
of
the
pit
and
cover it, before all is weighed down by a thick layer of soil
1
1
.
A
60cm
high
plywood
sleeve
temporarily
installed
on
top
of
the
wall
will
enable
a
higher
degree
of
compaction
and
fill
and
better
utilization of the silo space available
1
2
.
If
the
roof
is
build
low
(which
helps
in
keeping
the
rain
water
out),
pushing
the
lower
side
temporarily
up
while
filling
the
sleeve
or
top
part of the pit makes the job so much easier...
1
3
.
Once
the
silage
has
compacted
and
sunk
to
below
the
top
of
the
wall
(which
is
usually
within
a
couple
of
weeks)
the
plywood
sleeve
can
be
removed and reused for another pit
1
4
.
Forage
dry
matter
should
be
at
least
30%
but
can
be
really
high
(even
above
50%)
if
sufficient
water
(with
molasses
and/or
urea)
is
regularly sprinkled over it while filling
1
5
.
When
filling
low
dry
matter
or
very
leguminous
forage
don’t
add
water or molasses but Maize Germ Meal, Wheat Bran or Pollard
1
6
.
Tightly
packing
is
important
but
chopping
not
absolutely
essential,
even
long
standing
hay
or
whole
maize stover will ensilage successfully
1
7
.
Slow
fill
(one
pit
takes
us
up
to
6
weeks
to
complete)
will
ensure
a
higher
degree
of
fill
&
compaction
and allows ample time for the crop to be
“ammoniated”
by the added urea before it turns into silage


